In my article below, I would like to help those who want to upload a new blog article to their WordPress website.
With version 5.0 of WordPress, it got a new editing interface called Gutenberg. At the beginning of my article, I present the operation of this new editing interface. If you still have the older editing interface, scroll to the end of the article, there you will find the images for your version.
Tartalomjegyzék
- 1. Log in to the WordPress administration system.
- 2. Create a new entry (article).
- 3. Specifying the category of the article
- 4. Specifying the title and text of the article
- 5. Format the text
- 6. Specifying a featured image (Featured image).
- 7. Last step: save / publish / publish the blog article
- For users of admin interface before WordPress 5.0 (Gutenberg).
1. Log in to the WordPress administration system.
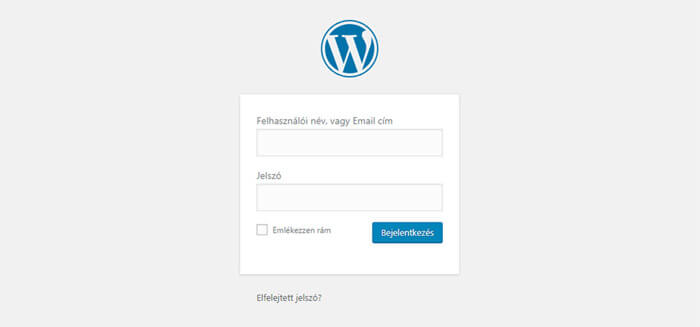
The admin part of the WordPress content management system can usually be accessed via yoursite.com/wp-login.php or yoursite.com/wp-admin. If the login interface shown in the image below does not appear at these addresses, this interface can be accessed at a unique address - usually for security reasons. In the latter case, ask your web developer what the address is.
2. Create a new entry (article).
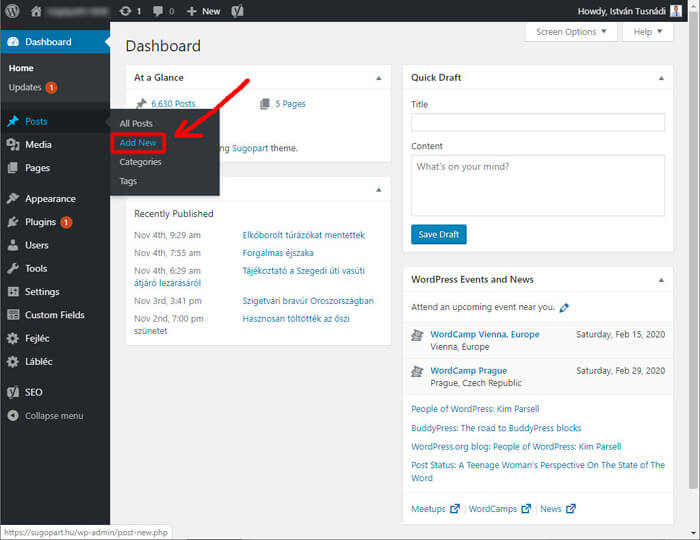
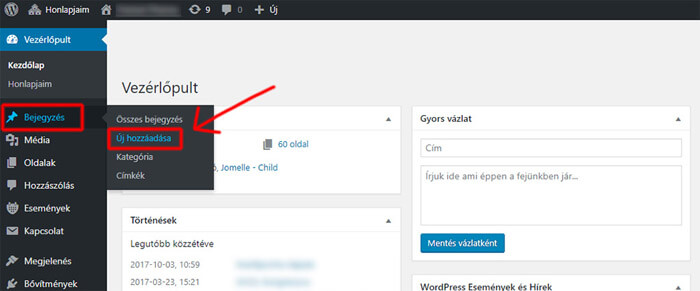
On the WordPress administration interface (dashboard) in the left menu, click on the Posts menu item and within it on the "Add New" link (Posts / Add New)
3. Specifying the category of the article
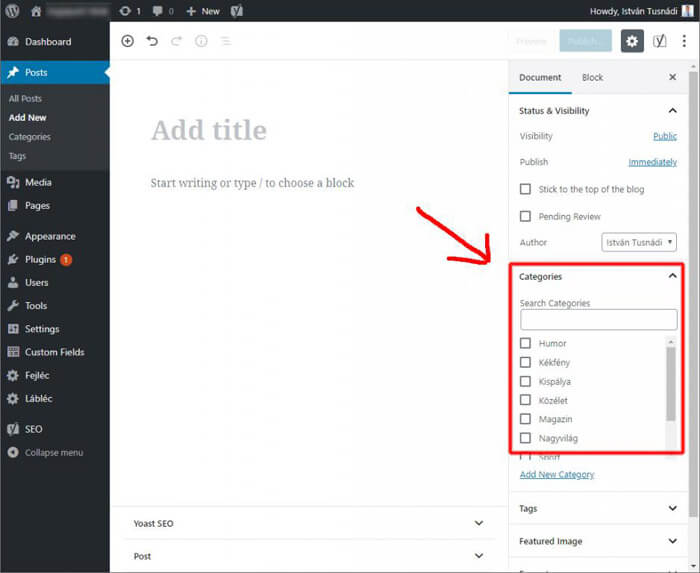
If the articles on the website are categorized, you can enter this in the section framed in red on the right.
4. Specifying the title and text of the article
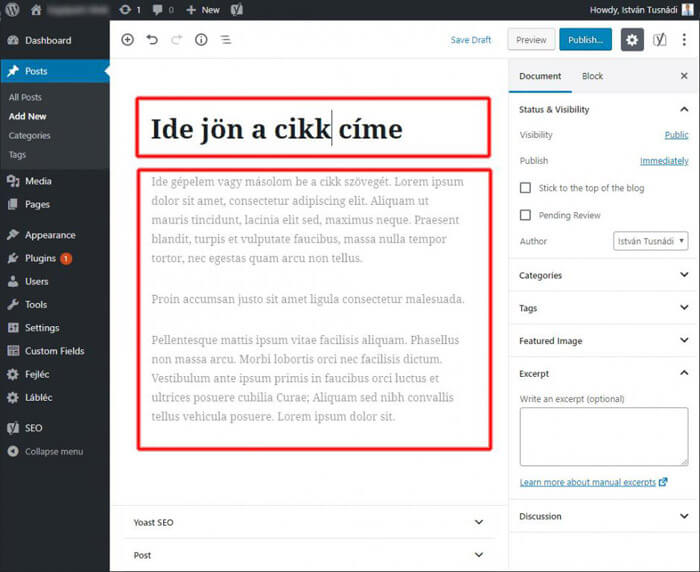
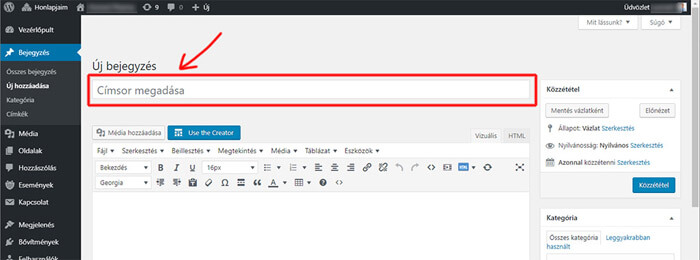
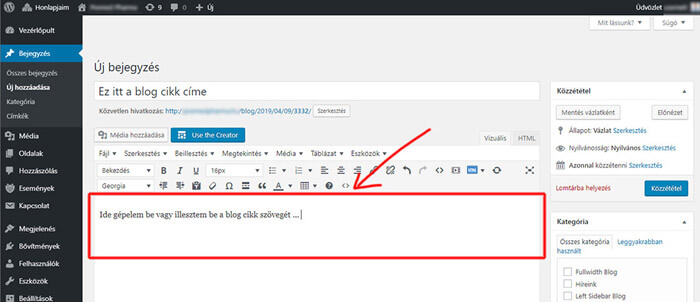
Enter the title of the new blog article by clicking on the "Enter title here" section at the top of the window that appears. Enter or paste the text of the blog article by clicking in the window below.
5. Format the text
The next step is to format the text. However, it won't be too complicated, since most of the articles only have simple formatting for easy readability and device-independent display. I recommend the following formats:
- Bold
- Subtitle
- Enumeration
- Numbering
Specifying an introduction (Lead).
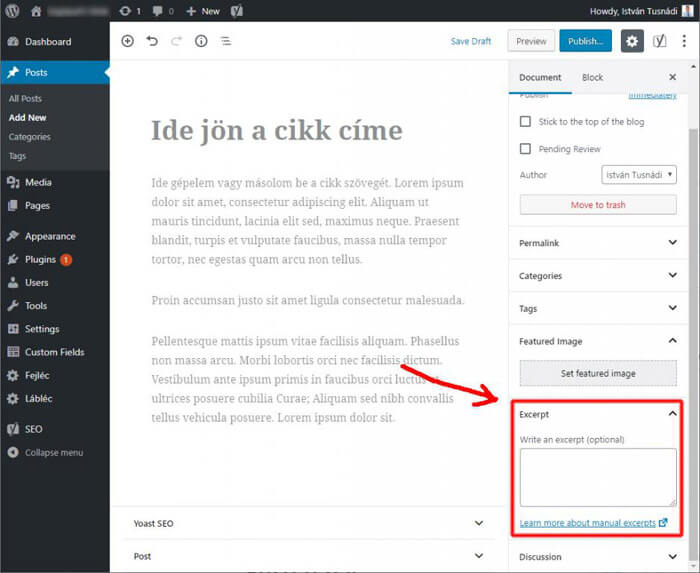
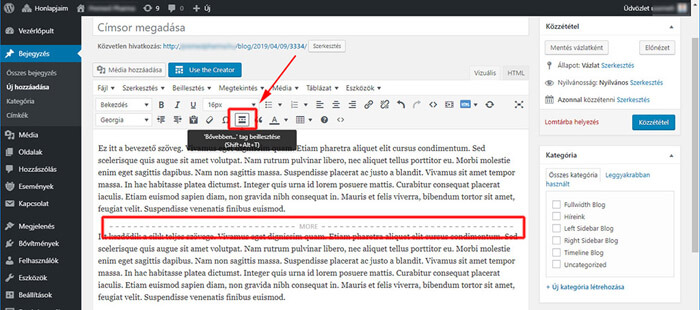
If you want to enter the text of the article's introduction, which typically appears on the article collection page, you can type it in the "Excerpt" field on the right toolbar.
6. Specifying a featured image (Featured image).
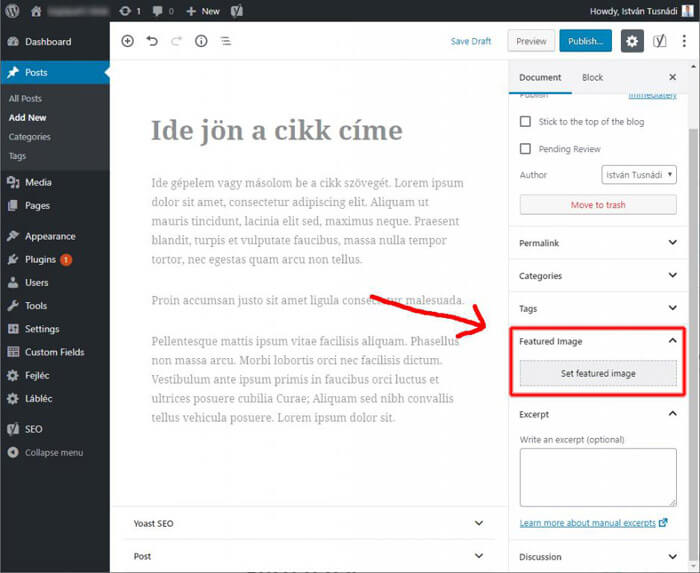
The highlighted image is usually displayed on the collection page next to / above the title of the article. If you have at least one image for each article, you must upload one for this new article as well.
In the image below, you can see that in the right part there is a box called "Featured image" ("Featured image"), in which you can select an image from the media library or upload a new image by clicking on the "Set featured image" link.
7. Last step: save / publish / publish the blog article
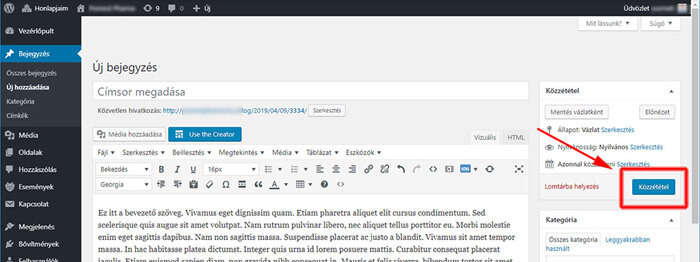
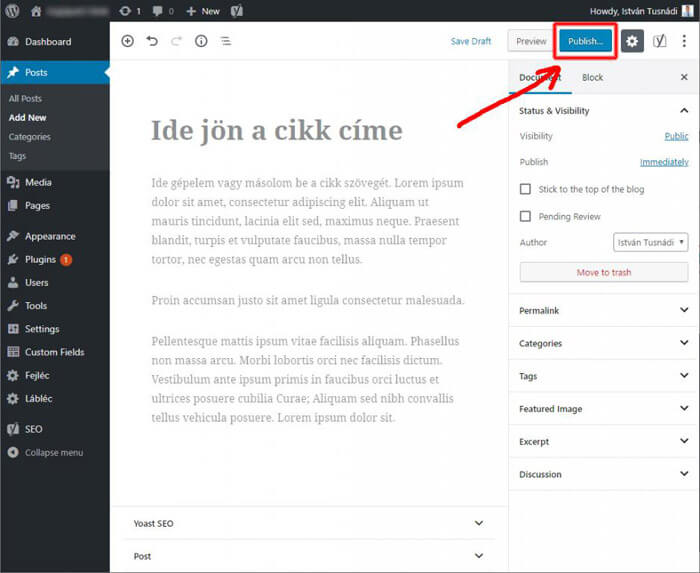
When you are done with all the formatting, click on the "Publish" button on the far right and the article will immediately appear on the website.
For users of admin interface before WordPress 5.0 (Gutenberg).
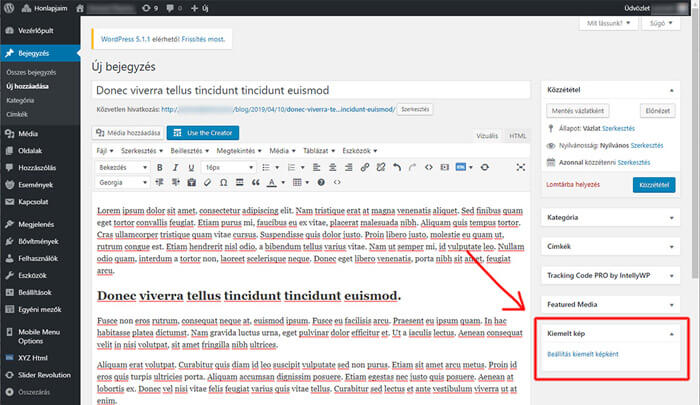
WordPress updates automatically by default, but in some cases the update may be disabled. In this case, you will see the following screenshots of the older version:
Create a new post
Specifying the title of the article:
Specifying the text of the article:
Specifying an introduction (lead):
Set featured image:
Publication of an article:
